Products
Solutions
Resources
9977 N 90th Street, Suite 250 Scottsdale, AZ 85258 | 1-800-637-7496
© 2024 InEight, Inc. All Rights Reserved | Privacy Statement | Terms of Service | Cookie Policy | Do not sell/share my information

The payment claim Details tab lets you view a summary of values, add and manage payment claim dates, and add comments, and update the status.
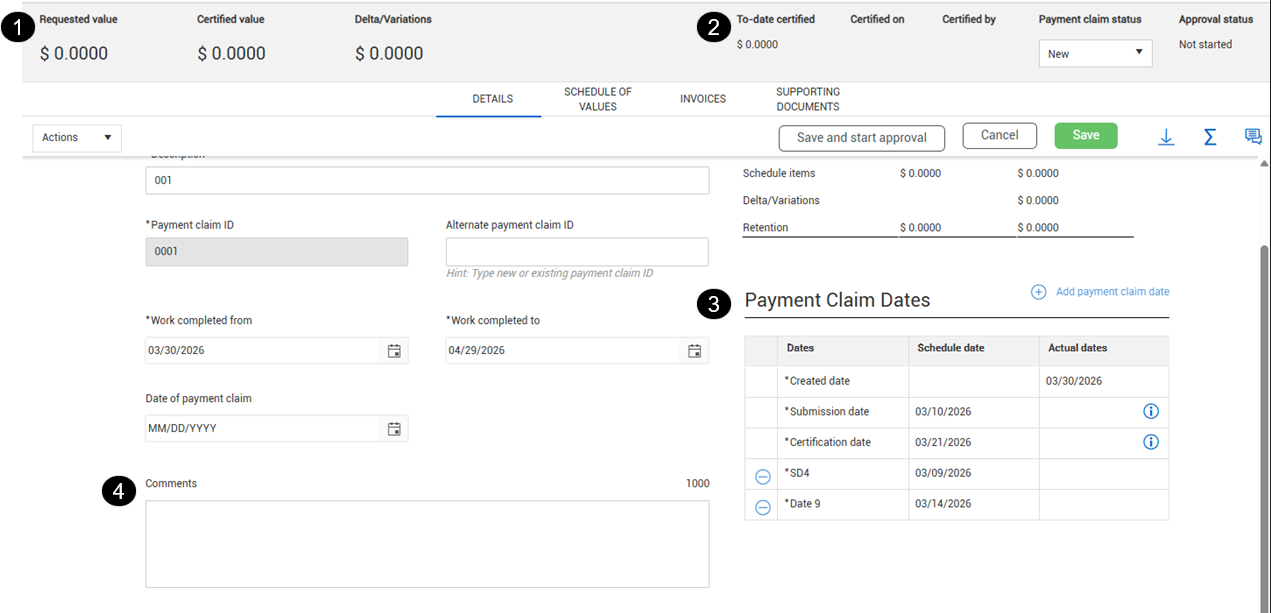
| Item | Description | |
|---|---|---|
| 1 | Header values | The value of the payment claim. Values are read from the schedule of values for the claim. |
| 2 | Payment claim status |
Shows the current status of the payment claim.
|
| 3 | Payment claim dates | The scheduled dates configured in the settings for claims in this project. The grid shows all dates that are set to Active and Default in the settings. If the Allow users to edit dates in a payment claim toggle in the Payment claim configuration at the project level (project > Settings > Contract > Configurations > Payment claim configuration) is set to Yes, you can add dates or remove dates except for the submission and the certification dates. |
| 4 | Comments | A text box for comments. You can continue to add comments after the claim is certified. |
The dates shown in the Payment Claim Dates section of the Details page were configured in the organization and project settings. You can add or remove dates to align with your business needs. You can also enter the actual dates for dates other than the Created date, Certified date, and Submission date, which are system generated.
Summary: Add a payment date when you need additional dates for your business needs.
Considerations: Only dates that are set to Active in the settings are available. The toggle for Allow users to edit dates in a payment claim in the Payment claim configuration at the project level (project > Settings > Contract > Configurations > Payment claim configuration) must be set to Yes.
Quick steps:
Click Add payment claim in the Payment Claim Dates section of the Details page. The Add payment claim dialog box opens.
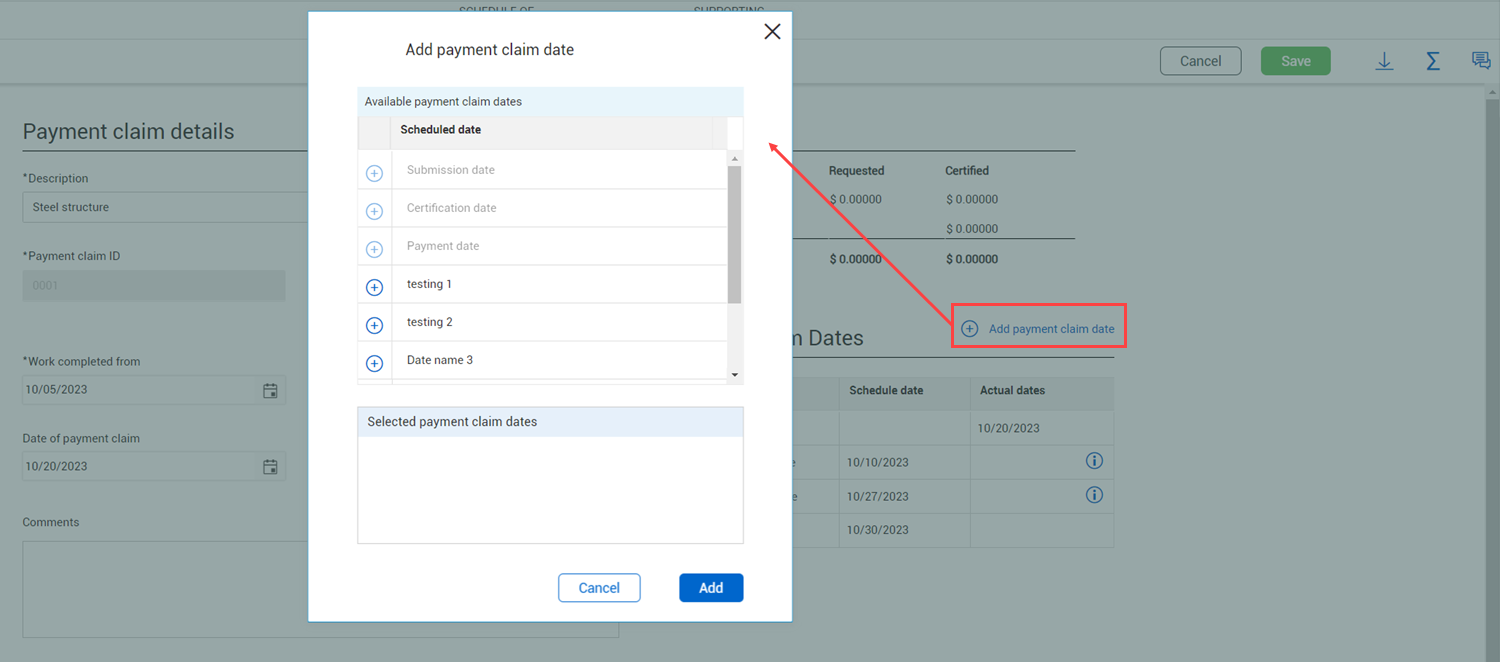
Click the Add icon next to the dates you want to add. The dates show in the Selected payment claim dates box.
Click Add. The dates are added to the Payment Claim Dates grid.
Click Save.
What's next: When the requirements for a date has been met, you can add the actual date to the grid.
Summary: Update the payment date when the communication for the date has been completed.
Considerations: The Created date, Submission date, and Certification date are generated automatically.
Quick steps:
Click the Actual date field for the scheduled date.
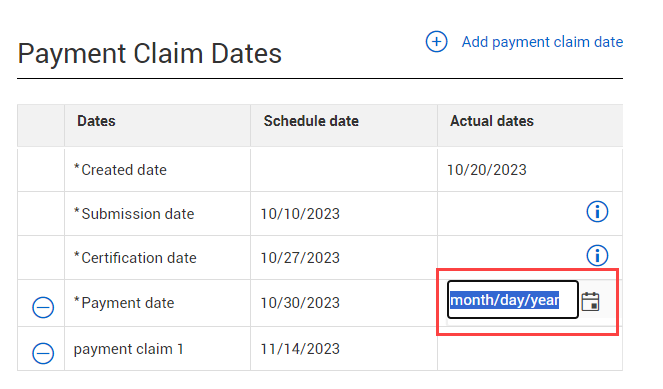
Use the calendar toggle or manually enter the actual date.
Click Save.
Summary: Remove a payment date when it is not needed for the payment claim.
Considerations: You cannot remove the Created date, Submission date, or the Certification Date. The toggle in the Payment claim configuration at the project level for Allow users to edit dates in a payment claim(project > Settings > Contract > Configurations > Payment claim configuration) must be set to Yes.
Quick steps:
In the Payment Claim Dates section, click the Delete icon next to the payment.
Click Save. The payment date is removed from the list.
Additional Information
9977 N 90th Street, Suite 250 Scottsdale, AZ 85258 | 1-800-637-7496
© 2024 InEight, Inc. All Rights Reserved | Privacy Statement | Terms of Service | Cookie Policy | Do not sell/share my information